
Regular audits of your steering components can prevent handling discrepancies and enhance driving safety. Addressing any signs of joint degradation involves direct inspection of the connecting mechanisms linking the wheels to the chassis.
The high precision of these connections influences the responsiveness of your driving experience. Acknowledging even slight looseness can prevent further complications, ensuring your suspension operates smoothly and effectively. Maintenance checks should focus on the condition of these pivotal parts, analyzing for any noticeable signs of damage.
In addition, understand that the alignment of these elements significantly impacts tire wear and overall control. Calibration is necessary when replacement occurs, as improper adjustments elicit unforeseen performance challenges. Scheduled inspections should promote longevity and proper function in all connected components.
Identifying Symptoms of Tie Rod Wear in Audi Models
Examine for unusual vibrations in the wheel when driving at steady speeds; this can indicate deterioration in component integrity. Listen for clunking or knocking sounds while turning or driving over bumps, as these noises signal potential damage in the links.
Assess the responsiveness of your vehicle; if you notice delayed reactions or excessive play in the wheel when turning, further inspection is necessary. A misaligned system may manifest as uneven tire wear, necessitating a closer look at the connections.
Also, check for any visual signs around the suspension components; cracked, frayed, or loose connections warrant immediate attention. If your vehicle pulls to one side during acceleration or braking, it could indicate a malfunction in the linkage.
Regularly monitor tire condition; irregular wear patterns, especially on the inner or outer edges, suggest underlying issues. A thorough examination can preempt more significant challenges later on.
How Steering Play Affects Vehicle Handling and Safety
Excessive movement in the linkages can lead to reduced precision during maneuvers, making it harder to control the direction of the automobile. This instability particularly manifests at higher speeds where the vehicle may not respond as expected to directional shifts.
Drivers may experience increased fatigue due to the heightened effort required for maintaining control, leading to a slower reaction time. Consistent vigilance is needed, as unexpected responses to input can occur. This condition elevates the risk of accidents, especially in emergency situations.
Regular inspection of the components for signs of destruction is imperative. Lack of maintenance may lead to further complications in the suspension system, amplifying handling issues. Replacing damaged or loose parts promptly not only enhances drivability but also contributes to overall safety.
Many experts recommend checking alignment and having a complete wheel alignment service performed whenever addressing any link-related concerns. This ensures that all elements work harmoniously, contributing to a balanced and responsive driving experience.
Listening for unusual sounds during vehicle operation can also serve as an early warning. Clunks or rattles could indicate issues with components linked to rod mechanisms. Address these noises without delay to prevent further damage.
Step-by-Step Guide to Inspecting and Replacing Tie Rods

Begin with lifting the vehicle using a jack and secure it with jack stands. This allows for safe access to the undercarriage.
Next, visually examine the components for any noticeable damage or corrosion. Look for loose connections or excessive movement in the joints.
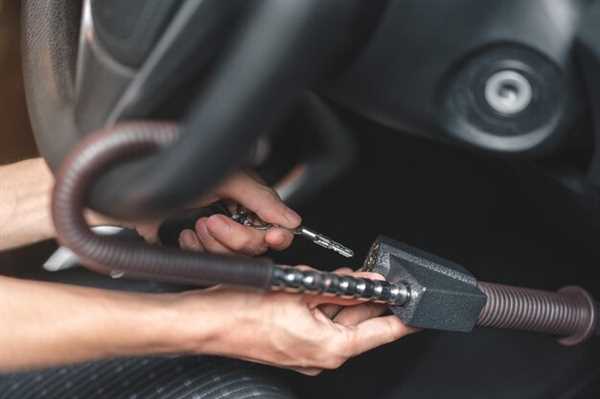
Utilize a wrench to loosen the securing nuts. This will enable easy removal of the assembly. Take a moment to note the orientation for proper installation later.
With the nuts removed, detach the assembly from the steering knuckle. A hammer may be needed to dislodge stubborn connections. Avoid damaging surrounding parts.
Compare the old component with the new one to ensure compatibility. Pay attention to length and attachment points.
Install the new assembly by reversing the removal steps. Tighten the nuts to the specified torque to prevent loosening during operation.
After installation, adjust the alignment as necessary. A professional alignment service is recommended for precise handling.
Test drive the vehicle to confirm improvement. Listen for abnormal noises and observe the handling response for any discrepancies.

